Cat Rides Motorcycle: How to Get the Most from Your Clipart PNG Design
If you have ever seen a design featuring a cat riding a motorcycle, you know it can be playful, edgy, or even whimsical. The idea of a feline gripping handlebars or leaning into a turn appeals to cat lovers, motorcycle enthusiasts, and anyone who enjoys a bit of humor in their art. That is why “Cat Rides Motorcycle” clipart PNG designs have become popular for T-shirts, stickers, mugs, and digital projects. The file you receive typically includes a high-resolution PNG inside a single zip folder, ready for cutting machines like Cricut, Silhouette, or Brother Scan and Cut.
But using that design effectively requires more than just downloading and printing. Many people run into avoidable problems that turn a fun concept into a frustrating experience. In this article, I’ll walk through common mistakes, misunderstandings, and overlooked details so you can avoid wasted materials, poor print quality, and unnecessary costs. Whether you are a small business owner printing shirts for a shop, a hobbyist making gifts, or a freelancer building a product line, the goal is to help you use your Cat Rides Motorcycle PNG with confidence.
What You Actually Get in the Zip File
Your download contains one zip folder. Inside is a single PNG file. It is high resolution, which is essential for printing on physical items. The resolution determines how sharp the image remains when scaled up. A low-resolution PNG may look fine on screen but becomes pixelated on a shirt or cup. The provided file is designed to work with major cutting machine software such as Cricut Design Space, Silhouette Designer Edition, Make the Cut, Sure Cuts A Lot, and Brother Scan and Cut Canvas software.
One misunderstanding is that the PNG itself works as a cut file. It does not. A PNG is a raster image made of pixels. Cutting machines need vector paths or a traceable outline. You will import the PNG into your software, then use its trace or image-to-cut feature to generate the cut lines. Some people try to cut the PNG as-is and end up with messy edges. Knowing this upfront saves frustration.
Ignoring Resolution and Print Size
The PNG is high resolution, but “high resolution” is relative. Always check the dimensions in pixels before printing. A file that is 3000×3000 pixels works great for a 10-inch design. But if you try to print it poster-sized at 24 inches wide, you may lose quality. A common mistake is assuming all PNGs scale infinitely. They don’t. If you need a larger size, ask the seller if a vector version is available, or plan to use the design at a moderate scale.
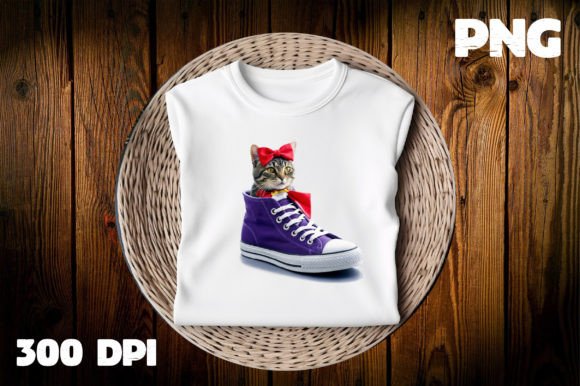
Better approach: Open the PNG in design software and set your canvas at the desired physical size at 300 DPI. If the pixels are too few, reduce the print size accordingly. Test a small proof before running a full batch of products.
Skipping the Trace Step for Cutting Machines
When you use a Cricut or Silhouette, the PNG must be traced to create cut paths. Many new users simply upload the PNG and hit “cut.” The machine then tries to cut the entire bounding box or the shape poorly. This wastes material and dulls blades. The tracing tool in your software converts the colored areas into outlines. For a Cat Rides Motorcycle design, you may need to clean up stray pixels or adjust the threshold so the cat’s whiskers and bike spokes are captured correctly.
Examples of mistakes: Using too high a threshold, which merges small details; or not removing the background before tracing, which includes unwanted white areas.
Correction: Remove the background first if the PNG is not already transparent. Then use the trace tool and preview the cut lines. Adjust the tolerance until the lines follow the edges cleanly. Test on scrap material once.
Overlooking Layering and Color Separation
The design may have multiple colors within the cat and motorcycle. If you cut each color as a separate layer without aligning them, you end up with misaligned pieces or wasted vinyl. Some beginners try to cut the entire design as a single color, losing the visual impact of a multi-tone cat or chrome handlebars.
Better method: Use the PNG to create separate color layers manually in your software. For example, the cat body could be one layer, the motorcycle another, and details like highlights a third. Group and align them before cutting. This makes assembly easier and the final product looks professional.
Neglecting Commercial Licensing
Many clipart PNGs come with personal use only restrictions. If you plan to sell products featuring the Cat Rides Motorcycle design—shirts, cups, stickers, hats—you must check that your license permits commercial use. Selling a shirt with unlicensed art can get you into legal trouble. Even “free for personal use” is not the same as “free for commercial use.”
What to check before buying: Look at the product description or seller’s terms. The download file information you received says you can “sell the products you print such as shirts, hats, cups, stickers, cups.” That indicates commercial use is allowed for printed items, but always confirm if the license extends to digital files or derivative works. When in doubt, contact the seller.
Using the Wrong File Format for Your Application
PNG is great for screen printing, direct-to-garment printing, and sublimation. However, for embroidery, you need a digitized embroidery file (e.g., .dst, .pes). For large format printing, vector formats like SVG or EPS are better. A common mistake is trying to embroider a PNG by converting it poorly, resulting in distorted stitches. Stick with PNG for printing and cut vinyl, not embroidery.
Realistic example: A small business owner buys the Cat Rides Motorcycle PNG, uses it for a sublimation cup (works perfectly), but then tries to convert it to an embroidery file using auto-digitizing software. The cat ends up with jagged edges and missing details. The fix is to pay a digitizer or choose a ready-made embroidery design.
Not Testing Before Full Production
One of the biggest oversights is printing a full batch of 50 shirts before verifying the design size, placement, and color accuracy. The PNG may look great on your monitor but print dark on a black shirt, or the cat’s tail may extend beyond the printable area. Test one item first.
Advice: Print a sample on plain paper and hold it against the product. Check that the white areas of the PNG are truly transparent (if applicable). For cut vinyl, cut one sticker and apply it to see how the material handles the small details. Adjust settings if needed.
What to Check Before You Download or Use the Design
- Resolution: Confirm the pixel size and DPI needed for your intended product. 300 DPI is standard for print.
- File Format: PNG is raster and works for printing and cutting with proper tracing. If you need vectors, ask the seller.
- Transparency: The PNG should have a transparent background, or you must remove the background yourself. Check before adding to a design.
- License: Verify commercial use terms if you plan to sell items. Keep a copy of the license for your records.
- Size Limits: Know the maximum print area of your equipment. A 12-inch design won’t fit on a 10-inch mug.
- Software Compatibility: Ensure your software (Cricut Design Space, Silhouette Studio, etc.) supports PNG import and tracing.
Practical Ways to Improve Your Results
Think of the Cat Rides Motorcycle PNG as a starting point. With a few adjustments, you can elevate it from a simple clipart piece to a professional-looking product. Here are some insights:
Enhance the Design Before Printing
If the cat’s features are too small or the motorcycle lacks contrast, consider modifying the colors or adding outlines. In photo editing software, you can add a stroke around each element to create a sticker-like effect. This also helps with cutting because the outline gives you a clear cut line. For sublimation, you can mirror the image and adjust saturation.
Optimize for Your Cutting Machine
When tracing in Cricut Design Space, set the trace mode to “detailed” for more accurate outlines. Use the “smoothing” slider to reduce jagged edges on curved parts like the motorcycle wheels. After cutting, weed out the small pieces carefully. A weeding tool with a fine tip helps with the cat’s eyes and spokes.
Combine with Other Elements
Do not be afraid to pair the Cat Rides Motorcycle design with text or additional graphics. For example, adding a “Meow” banner or a background like a road or sunset can make the product more unique. Keep the composition balanced so the cat remains the focal point.
Final Thoughts on Using Cat Rides Motorcycle Clipart PNG
The download you have is versatile and ready to use for many print-on-demand and craft projects. The most common pitfalls come from rushing into production without checking resolution, tracing settings, or licensing. By taking a few extra minutes to test a sample, verify your software workflow, and understand the file’s limitations, you can avoid wasting materials and deliver a finished product that both you and your customers will love.
If you ever feel unsure, look back at the file details: high-resolution PNG, compatible with major cutting machines, and intended for you to print on products for personal use or to sell. That is a solid foundation. Apply the tips here, and your cat on a motorcycle will ride smoothly from screen to finished product.
Thank you for visiting. I hope this helps you make the most of your design.